Sunday, August 25, 2013

Hello! It's Me Again!


Guess what?! I'm back to blogging again! I guess once it gets in your blood, it's impossible to be free from the itch. Come check out my new blog, chapter37. I'd love for all my old friends to come join in the fun. I have an all new store site as well!Check out the chapter37 shop HERE. Can't wait to see you there!

Pin It

Sunday, April 14, 2013

      I never thought when I started writing this blog for fun, that anyone would ever read it...and here you are...all 449 of you...with all your amazingly kind comments and opinions. Thank you for making this more fun than I ever thought it could be! After much thought, I've decided to lay down my "blogging pen." As a wise man once said, "To every thing there is a season, and a time to every purpose under the heaven:" (Ecclesiastes 3:1) 
      This will be the last post here on Morning by Morning Productions, although I'll still leave the blog up for anyone who wants access to any tutorials. Thank you for taking a small chunk of your time to visit with me in my little corner!

P.S. My shop is still open!

Ecclesiastes 3:17   ... for there is a time there for every purpose and for every work. 
Pin It

Monday, April 8, 2013

Anthro Inspired Maxi Skirt Tutorial


     Back in the day, before we bought this old ramshackled house of our's, that's taken over every spare minute of my time, I used to spend every extra second I could find sewing something. All this painting and whatnot has caused my wardrobe to suffer severely! (Ok, actually not really. I have way more clothes than I need.) Anyway, I did a bit of online shopping looking for some things I might like to freshen up my clothing selection for spring. My idea of "shopping" is to find something I like, and then figure out how to make it myself for a fraction of the cost. I came across this skirt, and I quite liked its casual scrappy look.

Niguel Maxi Skirt

     I used it as my inspiration to make this version. I used a denim-like jersey knit, and made a  basic maxi skirt (tutorial here) with some scrappy goodness added to it.


      If you'd like to give it a try, see my maxi skirt tutorial for what you should cut out. In addition to the waist band and the actual skirt, you'll need to cut out several long strips about a half inch wide. 


      Spread the skirt open and start laying out the strips in the design you like pinning as you go. I flipped my strips wrong side out so that the fabric would contrast, but you don't have to do that.


     I pinned the strips all in place, and did not trim the ends just in-case I wanted to rearrange while sewing.


      I sewed them on, starting front and center, and sewing down the center of the strips. I used a long, narrow zigzag stitch so that the skirt would retain all of it's original stretchyness.


      If you aren't using a walking foot on your machine, you might find that  the fabric wants to bubble and bunch a bit as you sew the strips down. You can fix that by putting your needle down, and lifting your foot to ease out the fabric.


       Once your strips are all sewn on, sew up the back seam. I matched my strips at the seam, but I don't think the Anthro version does, so anyway you like works.


     Finish up with the waist, hem, and press.


       Mine cost me around $10 and it couldn't have been more simple to do.


     Among other things, I am bound and determined to make a decent button down shirt for myself that actually is long enough in the arms and torso! Except, I've never done one before...so we'll see how that goes. Have you done any spring shopping lately? What will you be adding to your wardrobe?

1 Peter 1:24,25   For all flesh is as grass, and all the glory of man as the flower of grass. The grass withereth, and the flower thereof falleth away:  But the word of the Lord endureth for ever.
Pin It

Monday, April 1, 2013

Sewing desk #2 - Ladder style


     So, are you tired of seeing desk/shelving projects around here yet? My work shop room is just about situated the way I want it, so this should be the last one for a little bit.


     I decided to move my little industrial style desk to a different spot in the room and put my serger on it instead of the sewing machine. Therefore, a new solution was needed for the sewing machine. Enter two old wooden ladders. One I found in a closet in this house when we moved in, the other I found at a junk store a while back. Happily, they were the same height and perfect for this project.


      I laid a board across the top and screwed it on from the bottom side.


     I dry brushed it with white, mint green, a bit of orange, and brown.


     I painted a few scrap boards to add some more storage options.


      I already had the chair on hand, which was the perfect height as well.


      Oh, and check it out! I finally got around to painting that cinder block wall to match the other one! While this desk may not be everyone's style, it fits the ticket perfectly for me... sturdy, simple, non-generic, and quite functional. I adore it. (Plus it was free to make, so that's always a major plus!)


       Of course, the reason I needed to do this project, was that I had two little Easter dresses that needed sewing...which may have not been finished until five minutes before walking out the door Easter morning...


      ...and my little girl's were just as pretty at two little robin's eggs...but, maybe I should consider not procrastinating next year...but, that's a different tale for a different time.


   Psalms 37:39   But the salvation of the righteous is of the LORD: he is their strength in the time of trouble

Thursday, March 28, 2013

Happy Easter!

He IS Risen free Easter Printable. aka design. #printable #Easter #chalkboard

     Spring, Easter, life...all things that shout to us just how much we are loved by God in Heaven. I hope you'll take a moment to reflect on just how much God loved and sacrificed for us this special weekend...as fun as pretty eggs and chocolate are, they don't much compare to the special gift God himself gave us.  I wish you and your family a very happy Easter weekend!

 1 Peter 3:18   For Christ also hath once suffered for sins, the just for the unjust, that he might bring us to God, being put to death in the flesh, but quickened by the Spirit: 
Pin It

Tuesday, March 26, 2013

Your order has been shipped...my "mail cart"


      I have a short attention span when it comes to projects. Like, reeeeaally short. Which is why I must have thought it would be a good idea to get a whole entire house that needed redoing....because I can get that done in a day of course. As you know from my last post, we're making pretty good headway in the kitchen. Although, every other day or so, I've got to come up for air and do something different, or I'll go batty. To keep from getting bogged down,  I've been bouncing back and forth between my work shop and the kitchen.


     So, let me introduce you to the "mail cart". I love my Etsy shop. I'd spend all day doing nothing but sewing up things for it if I thought I could get away with it. One of the funnest parts of selling online, is getting to send my stuff all over the world. I love packaging up orders and daydreaming about where they are going.


     Here on this little cart/shelf, is everything I need to print out shipping labels, wrap orders, tag them with a business card and a thank you card, and get them out the door.


     Castors on the base make it easy to push around if I get a hankering to rearrange. (Which most certainly will happen, given enough time.)


    Random baskets, jars, crate, and an old chicken feeder help organize envelopes, labels, printer paper, pens, scissors, twine, and every other such thing I need to ship an order...and keeps me enormously happy, because it doesn't feel too stiff and office-y. 


     A painted thrift store frame and a bit of twine make a handy pin board to top it all off.


     Nobody said work had to be boring after all!

Psalms 91:4   He shall cover thee with his feathers, and under his wings shalt thou trust: his truth shall be thy shield and buckler.

Thursday, March 21, 2013

DIY Kitchen Countertops


          Every now and then, you come across things (or whole rooms) in your house that just need a little sprucing up...you know, they just are lacking something. Sometimes you can't just put your finger on what that might be...


     ...and sometimes...you can figure it out pretty easily.


       If you read this post about my unfortunate pink kitchen, you know I had big plans for this unsightly room of mine. "Big plans" equals "big work", and in most cases, "big spending" as well. Work, I can handle, the money part on the other hand...well, we might just have to consider that one a bit. I decided to shop our options for counter tops. We needed something cost efficient and durable. 
       One thing we knew for sure, labor is the major cost of any home improvement, so we wanted to the work ourselves...even though we did not have a clue what we were doing!


         Obviously, the first thing we had to do, what get rid of few things.


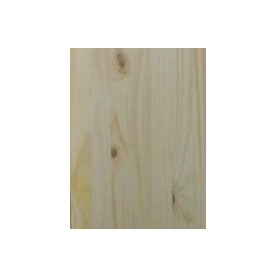
       Then, using liquid nail and screws, we attached a new counter top using pine panels found in the lumber section at Lowes. You can buy these in different lengths and widths. We used 24 inch wide and 1 inch thick pieces.

 1-in x 24-in x 36-in Stain Kiln-Dried Kiln-Dried Elliotis Pine Panel
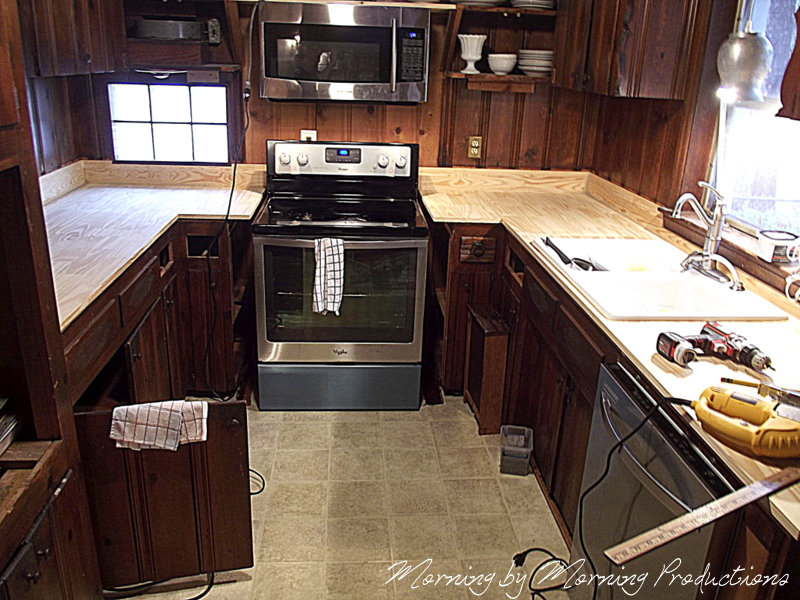
    My mister cut them to fit together around the corners and used a jig saw to cut out a spot for the sink. He screwed them on from underneath. I very dumbly deleted all of the pictures I took of this entire process, but it's pretty self explanatory. Glue, set the boards in place, and then screw. I pretty much think he did an amazing job getting everything to fit just right.


      At that point, I took over, and used an electric sander to even out all the cracks and make it baby smooth. The sink really should have been put in last, but we didn't figure that out until right about this point. Oh well. After sanding it down, I stained it with black stain.


      At this point, I was starting to wonder if this had been such a good idea after all. We were too far in to quit now, so next up was the varnish. I used a heavy duty Polyurethane and a sponge brush to apply it.


     I gave it six coats, lightly sanding between each coat. It looked immensely better with some shine!


    To be honest though, I still wasn't 100% sure I was on board with it though. It was all just so dark looking still, that I couldn't really tell if they were good or not. A little white paint to let the sunshine pour into that dingy old dark kitchen did the trick. They get my vote now, for sure and for certain!


      Sometimes, looking at what things cost can be quite disheartening ..but maybe, you're just looking in the wrong department? There's no law that says kitchen counters have to be ordered from the kitchen department. They actually might be hiding out in the lumber isle...or the roofing section, or on the cement shelf, or you name it!


       You can make just about anything work, if you are willing to give it a try...even if you've never done it before! What can it hurt? Most likely, even an imperfect job will be worlds better than what you started with!


    Things don't happen over night, but as with anything, persistence will pay off! And now that I've delivered this inspiring pep talk, I'm off to paint cabinet doors...which anyone within a 50 mile radius has probably heard me griping about in the last week! I don't see why we need cabinet doors anyway...
Have a great weekend!

Hebrews 11:1   Now faith is the substance of things hoped for, the evidence of things not seen.